Showing posts with label gouache. Show all posts

Thursday, March 31, 2011

Fun & Easy Gouache Paint Tutorial


I'm re sharing an easy and fun 
tutorial I put together awhile back 
using gouache paints.
Click HERE to view it.


For unique gifts visit

Sunday, September 05, 2010

Gouache Painted Sunflower Tutorial

  SUNFLOWERS
Sunflower, sunflower, standing straight and tall,
Sunflower, sunflower, you're the tallest flower of them all!
Sunflower, sunflower, when your seeds fall to the ground,
Sunflower, sunflower, by the squirrels they'll be found!
 
 We recently harvested our sunflowers,
and I just loved the look of them 
lying there with a kind of shabby 
chic look to them.

 I'd like to try preserving one of them.

One of the pictures I turned to greyscale 
so that I could paint it with Gouache paints 
which are opaque watercolors. 
See my below:
 Click HERE to follow my tutorial


Artistic Inspirations to help you create!
 

Wednesday, January 06, 2010

Altered Bingo Board


Step into the wayback machine (10 points if you can name the show that's from) and visit a past post (HERE) where I show my technique on using Gouache (pronounced Gwash) paints to colorize black and white images. If you look closely you can see these lovely ladies in the background that I had originally painted using the gouache paints. Now jump back in the wayback machine to present time and here you are with the above piece. I originally had added my colorized ladies to an altered vintage bingo board, but then was at a loss, thus it sat around ever since not knowing what else to add to finish the piece. Then BINGO the right wording I wanted to use came to me and I added that along with a glass half marble (hard to tell in the picture, but its magnifying the bird nest she's holding) and a chain to finish it off. This goes back to what I've said in the past...never give up hope on a project nor be discouraged because the right thing will eventually come along. Yes, I admit it can be frustrating, but that's why I work on more then one project at a time. I've learned to trust and have patience and not try and push it.


Visit my Zazzle Store &

view my newest additions!


Friday, May 02, 2008

Software Recommendation

I just have to share a software recommendation.... if your a blogger that gets frustrated because you can't get pictures uploaded and sized right and things go wonky for you check out WINDOWS LIVE WRITER and download a free copy. I've come across this software mentioned several times and finally took the time to download it (not that it took anytime at all) and loaded and I have to say its very user friendly, I'm loving it! Click the following link to read more about it and download your own copy: http://get.live.com/writer/overview

A little Play time

I've been busy the last few days creating a couple of pieces just for fun...not because it was for an obligation, swap or specific purpose, but just because and man did it feel good!

(remember to click images to enlarge them)

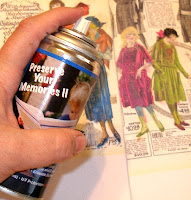
I began the first piece by using another wood palette as my base. I gessoed it and then misted it with repeated layers of ldypaletteColor Mists using the heat gun to dry in-between layers. I then sealed it with PYM II . After it dried which is extremely quick, I drew the image and painted it in with Gouache watercolor paints and then sealed again. The bubble was cut out from the text of a book page and sealed with matte fluid acrylic and then painted with 2 coats of transparent glaze mixed with Golden's Titan Buff and once dry the wording was added using a rub-on and then sealed again. I drilled holes with the drill press and added the wire and beads.

attitude ATTITUDE is a chunky 6 x 6 canvas. I started by creating a frame around the sides and border using book pages. I then painted over that with a couple of coats of transparent glaze mixed with Golden's Titan Buff to cover up the wording just enough. After that I painted the center with acrylics and wrote into the wet paint with a rubber tip some wording, once that was dry I painted the image using gouache watercolor paints and water soluble oil pastels then sealed it with PYMII.

Sunday, August 26, 2007

Gouache Painting

I finished up a couple more gouache painted pieces. For the base I used masonite panels that I have to say, I'm quite addicted to using them, because they don't warp and are a hard surface to work on unlike Canvas boards which tend to warp. To me the masonite seems more versatile, not only can I get them wet, I can drill or screw things into them to add heavier items as well. I'm really loving the 5"x9" panel size. I've decided to start carrying both the panel size and the pre gessoed 8"x10" masonite boards which incidentally work great with the Color Mists! I love the smooth white surface to start from. If your interested in trying these check with your local art supply or you can get them from my online store Outside The Margins HERE.

On both of the following panels I gave them a quick coat of white gesso and then painted the backgrounds using gouache watercolors. I mix a lot with white to get the different highlights and hues. Once the backgrounds were finished I sealed them with PYMII and then added the images I painted with the gouache paint and sealed lightly with PYMII. Since I'm still trying to use up things I have I cut the bird from some scrapbook paper and used some stickers for the wings and crown on the second piece. Once I adhered the images with gel medium I go back and outline with a black water soluble oil pastel and work it in using my finger and remove any excess with a baby wipe to add shadow and give depth to the images.

Here's the before picture I used and then the after picture which I painted with the gouache paints and again adding further detailing with pens, I then sealed it with PYMII and adhered it to the masonite panel:


...Again the before picture, and after picture once it's been cut out:

I like to go in after and add detail and highlights with a black Micron pen and Pastel Sailor Pens.

Here it is completed:

***************

Again in my need to try and use up some of the supplies I have lying around on my work space I made this copper triptych shrine. I aged the copper using Color Mists then zapping it dry with the heat gun. I then cut out the shape, embossed it with a ball point pen and then sealed it with PYMII . I also used up more of some bird stickers I probably will never be able to use up in my life time and some decorative paper and a tag board alphabet initial.
Happy Creating!

Friday, August 17, 2007

Gouache Technique

Big thank you goes out to Susan Chong and her wonderful ephemera she so generously shares. I've had great fun painting them with gouache (pronounced "gwash" like squash) paints.

Below is my quick and easy process:
I first print the image out on Epson's Matte Photo Paper with an HP ink jet printer no sealing before hand.
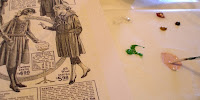
I begin by squeezing out small amounts of paint and thinning it way down with water. I like to use both a thin liner brush and a small filbert shaped brush.
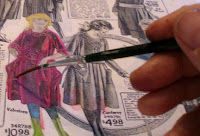
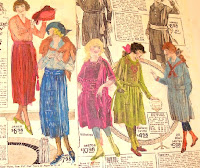
I don't get overly concerned with painting outside the image since I'll be cutting it out later.

Here's a few finished images

Once the images are dry I seal it with PYM II.
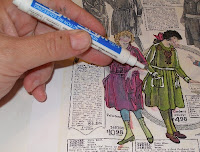


After I sealed it, I then outline and add detail with a black fine micron or sharpie pen, and then add highlights with a white sailor pen and gel pens.

Here's the finished image after I've cut it out.


I painted the background with the gouache paints on a gessoed Masonite board, I then added the image after scanning the piece and printed out a smaller image of it, so I could put it behind a wooden doll house window.

The saying reads:

"You never find the path to your self,

but rather, you find your true inner self

along the path inside you."