I was excited to see the theme for the Gothic Arch Challenge was anything goes. Since it's been warm here my muse immediately thought of a beach theme.
I dug through my stash and found a background I had already started (I like to start backgrounds and then put them away to use down the road). I had used a piece of off white weathered paint paper from OTM's pastel paper pack (it's hard to tell but the pack really does have some cool papers that can be further colored and altered) and then used chalk inks and inked around the shape of a bird sticker and then removed it.
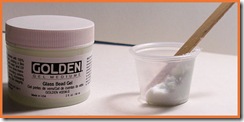
I decided I just had to play with the glass bead medium again, so I created some faux sand using it. See my process below:
Faux Sand
Add glass medium in a small container
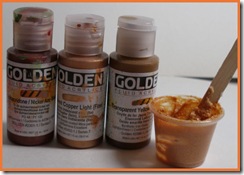
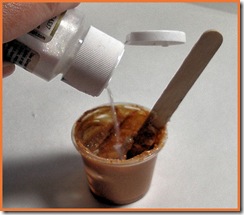
Add 1 drop of 2 Drops of Nickel Azo Gold, 2 drops of iridescent Copper (light), 1 drop of Transparent Yellow Iron Oxide, mix well.
Add extra fine iridescent glam glitter as desired and mix well again.
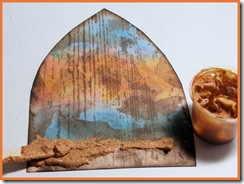
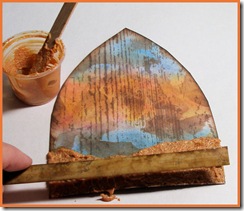
Spread peanut butter looking mixture onto card.
I added a piece of bamboo trim I found and cut the end to fit.
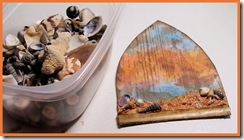
Embed small shells into wet mixture and allow to dry.
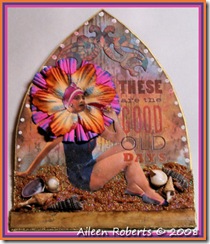
Finished Arch!
Here's the saga story of my arch...
As I began using the glue stick on the back of the image the glue was a bit too sticky and I it just ripped her head right off her body...yep, I had a headless beach babe LOL shoot, I thought I really wanted to use this Vintage Beach Babe image! Then I thought hey, I'll just add another head from a bird or something like that...yep that sounded good! Off I went to go through my bird images and then I got ready to print out my sheet of heads, and for two days I tried to get that sheet to print...nada! There was some kind of corruption problem between the software and the printer. Dang it! I thought, I just want to finish this piece! So early this morning as I was sitting there caffeine deprived waiting for my coffee to be done. I had a brainstorm looking down seeing the head staring up at me and then the flowers, and the piece FINALLY came together Whoo-hoo!

Well, at least you didn't lose YOUR head over this! Your arch looks fabulous. That background is to die for. I want to try your faux sand, but I don't have any of the glass gel stuff. Another thing to buy! I've used pumice gel for sand, but yours is much prettier.
ReplyDeleteThanx for the faux sand info...will have to try with regular medium. I just found some and too expensive to waste.
ReplyDeleteI loved how you worked out the head. I love improvising!!!! Right up there next to recycling!!!!
Your arch turned out beautiful. Great save on your beach babe!
ReplyDeletearlene
Your Gothic arch is beautiful. : ) Thanks for sharing the sand technique!
ReplyDeleteOlivia
Wow this is absolutely STUNNING.
ReplyDeleteBrilliant background. Love it.
I learn so much from you!! What is the swirly embellishment at the top of the arch
ReplyDeleteI love your gothic arch - you know I ALWAYS love anything with a beach theme! Your process was so interesting and I really appreciate you sharing the steps!
ReplyDeletehugs,
jackie
This is wonderful, the sand technique worked so well and you rescued the beach babe to perfectly it is such an awesome arch x
ReplyDeleteGood save on the headless beach babe. Really cool arch. And, I love the sand technique. You think up the nea test techniques.
ReplyDeleteJoanne
Gorgeous arch
ReplyDeleteGreat arch, thanks for the technique!
ReplyDeleteAileen, your solution to the headless beach babe was genius. Love it. Janene
ReplyDeleteFabulous Arch!
ReplyDeleteAnother terrific creation! you are amazing.
ReplyDeleteI am ready for the beach, thank you very much! Your arch is terrific, thanks SO much for sharing the creative process ;)
ReplyDeleteSuch a BEAUTIFUL arch! I'm so glad I came upon your blog! Your work is so inspiring! Very talented you are! Off to read more of your blog! ~hugs~
ReplyDeleteFabulous arch and hilarious account of its creation.
ReplyDelete